SmartHouse.__init__()
Posted on 2022-09-08 in story
I recently took some initial steps towards home automation by installing a smart thermostat and setting up Home Assistant. Here’s a rundown of my experience.
Prologue: Meross Smart Switch
Actually, I guess I started down this path a few months ago. In preparation for a family vacation to Seattle, my father-in-law purchased us a set of four Meross smart outlets. These units are Wifi-enabled but also have an actual manual button on the side. This is nice - you can turn things on and off “The Old Fashioned Way” without needing an app.
Before leaving on vacation, I went about setting up these outlets in four different rooms in our house and connected a lamp to each. Initially I named each of the outlets based on their serial numbers. Pretty quickly I realized that this wasn’t a good idea and revised the names to something much more sensible.

Once everything was hooked up and working, I had quite the good time turning each of the lamps on and off via the app. However, I forgot to set a programmed schedule before we left - which pretty much defeated the purpose of getting them set up in the first place.
However that turned out to prove the usefulness of these outlets. We were a few days into vacation when I was riding on I-5 and remembered that I hadn’t programmed our smart lights. So I pulled out my phone, did some quick reading of the docs, and configured a “on at dusk, off at sunrise” program for the four lights from 2,000 miles away.
This turned out to be much easier than what we had done in the past. We have a single timer that plugs in to an outlet, and I had configured it prior to leaving on multiple previous trips. However it was difficult to use and I had to look up the manual each time we wanted to use it. Having the Meross smart outlets makes this much easier moving forward.
And, as much as I hate to admit it, since returning from vacation I have turned off the reading light in our room via the app when I was too lazy to reach over and do it manually.
Smart Thermostat
A few months ago our natural gas provider sent information on an incentive program for smart thermostats. There were a number of offerings ranging from free to substantially discounted. We decided to go with the ecobee lite model, which was discounted roughly 70%.
I read the installation instructions a few times before unpacking the hardware, and there was some ominous language about “your thermostat is probably compatible”.
Hardware Installation and Unexpected Re-wiring
And so it happened that early on a Saturday afternoon I took the plunge and unboxed the hardware. The instructions estimated that installation would take roughly 30 minutes. Given my previous experience with DIY around the house I figured that would roughly correlate to three hours, give or take.
Right off the bat there was some drama with children facing the possibility of an afternoon with no screens, but it turned out that our furnace had a handy shutoff switch. With power turned off, I successfully removed the cover on the furnace and the cover on the thermostat.
Sure enough, the wiring didn’t match anything in the instruction manual:
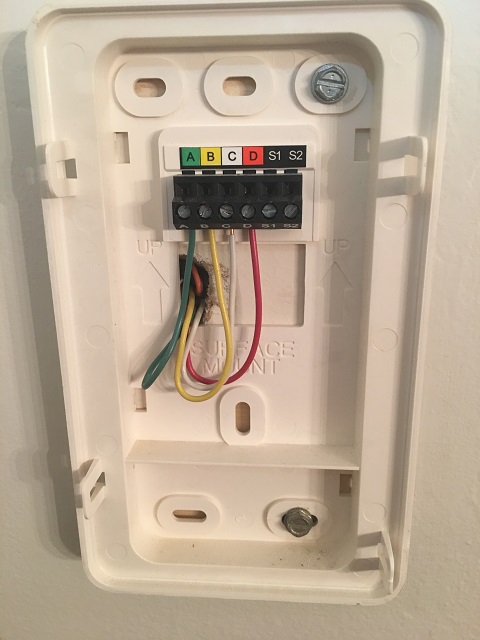
Some internet research confirmed that existing HVAC system utilizes a manufacturer-specific “communicating” thermostat. I feared that we were potentially dead in the water, but ultimately found a very helpful thread from a pro that explained the basics of our current Carrier system. The pro ended up talking the original poster through the necessary steps for implementing a Wifi-compatible thermostat.
Most importantly - in my eyes at least - was the note that this reconfiguration would not violate any warranty provisions. And the internet is always right, so I was ready to plow ahead.
I took another look at the wiring in the wall behind the original thermostat and noticed that there were three or four additional wire strands available, should I need them. Tracing things back at the furnace control panel confirmed the same. I was also easily able to identify the same four wires at the furnace.

Without too much trouble I was able to remove the plug and disconnect each wire. Based on the ecobee manual I just needed to match the wires based on color, with the exception of the white C power cable. I moved the wires over to the conventional terminals on the front of the furnace board and tightened everything down.
I had a little bit of confusion over the Y and Y2 options, but figured that Y was the default and would make the most sense.
Upstairs, I did a similar bit of wiring to connect everything based on the defaults shown in the installation manual. This was pretty straightforward, although I did wonder if I should be using more than just these four wires.
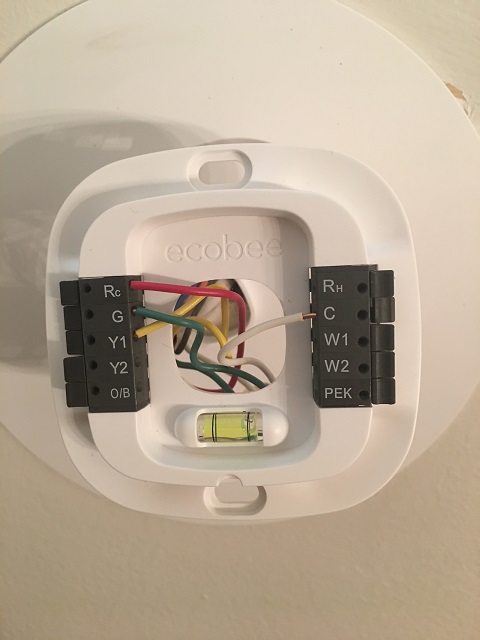
I took a hard look again at where I had landed on the back of the thermostat and realized I needed to go back downstairs and make a small tweak at the furnace.
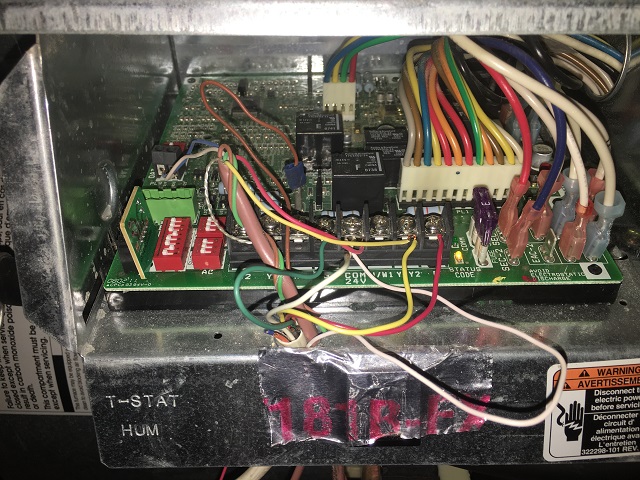
I flipped the power back on at the furnace and nothing threw sparks, so I figured that was a good sign. Back upstairs, I connected the thermostat per the instructions and let it power up. Everything went smoothly there and before long everything was up and running.
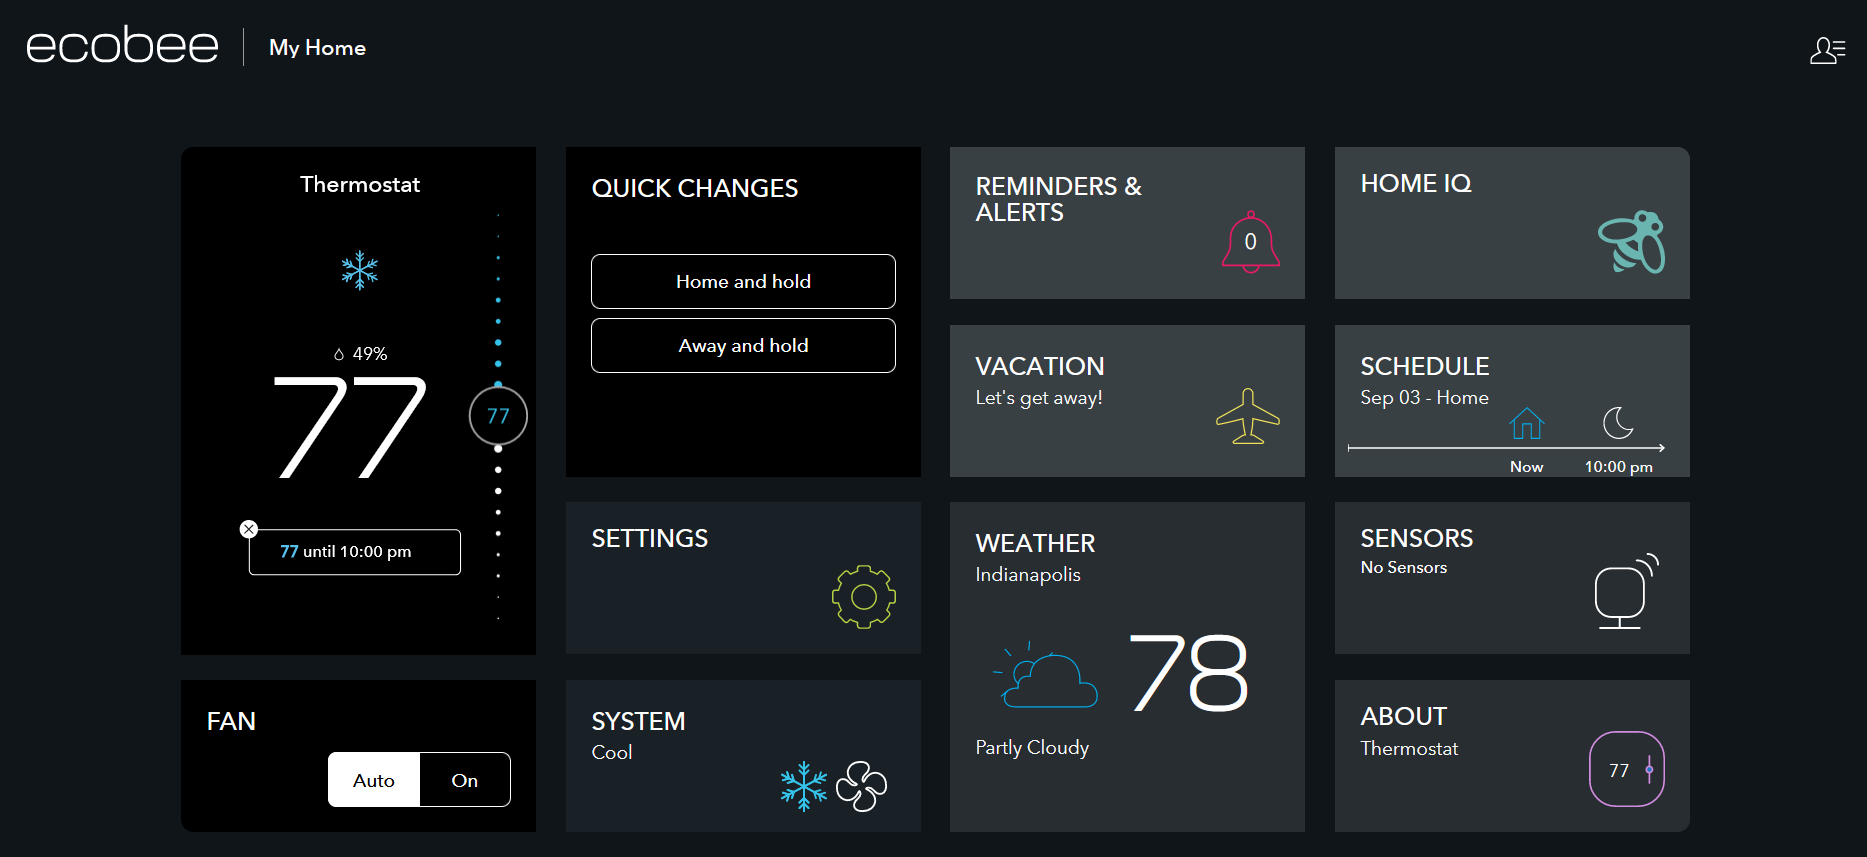
The initial program was pretty basic - hold 78 during the day and cool off a few degrees at night. Our house is not typically empty during the day, so there was no need to vary things based on occupancy.
I did notice that the thermostat seemed to only have two states - cooling and off. That seems to confirm my initial hunch that I will need to attach more of the available wires at both the thermostat and furnace to be able to manage heating as well. I probably should research this some more, but at this point in the build I was just about ready to call it a day.
I went ahead and created an account with ecobee and explored their website.
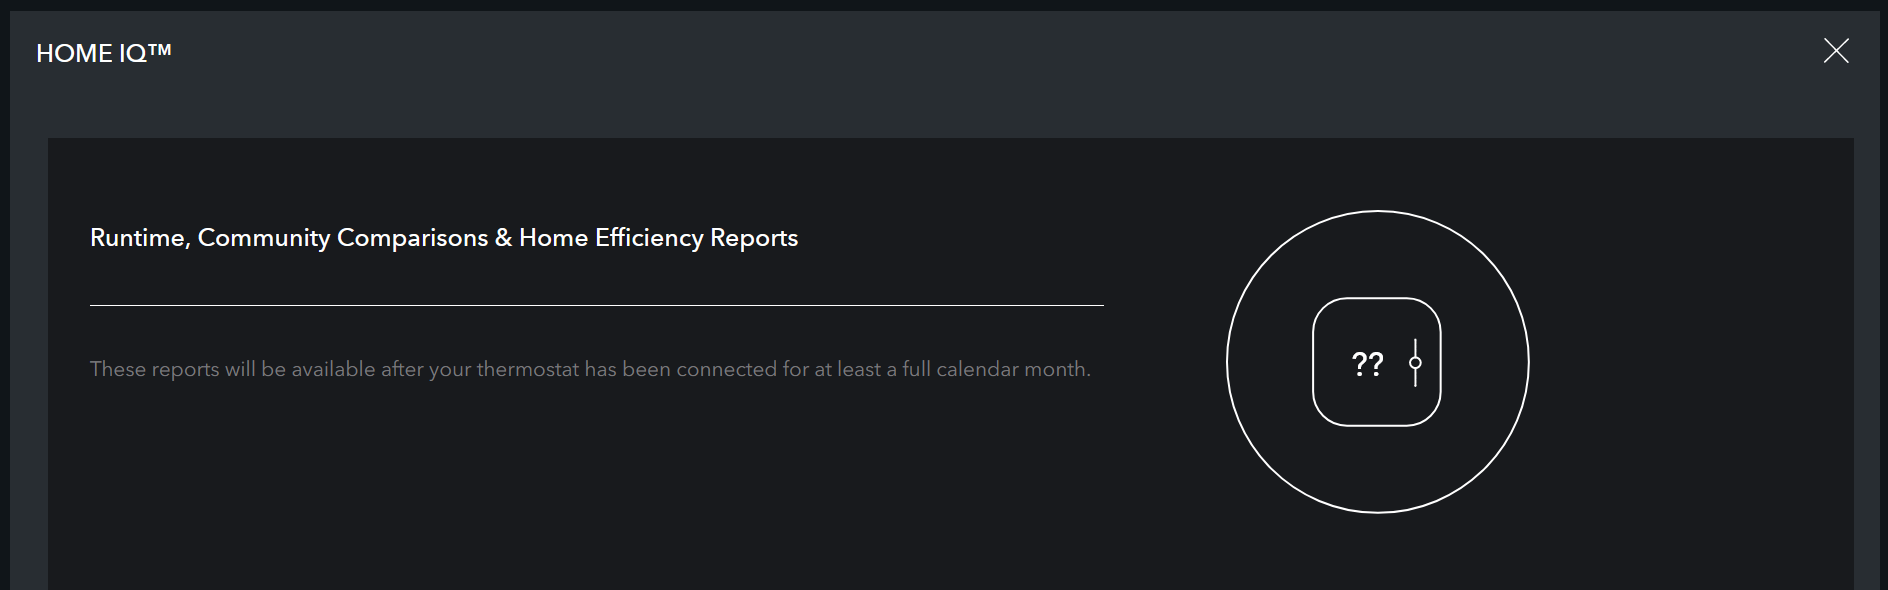
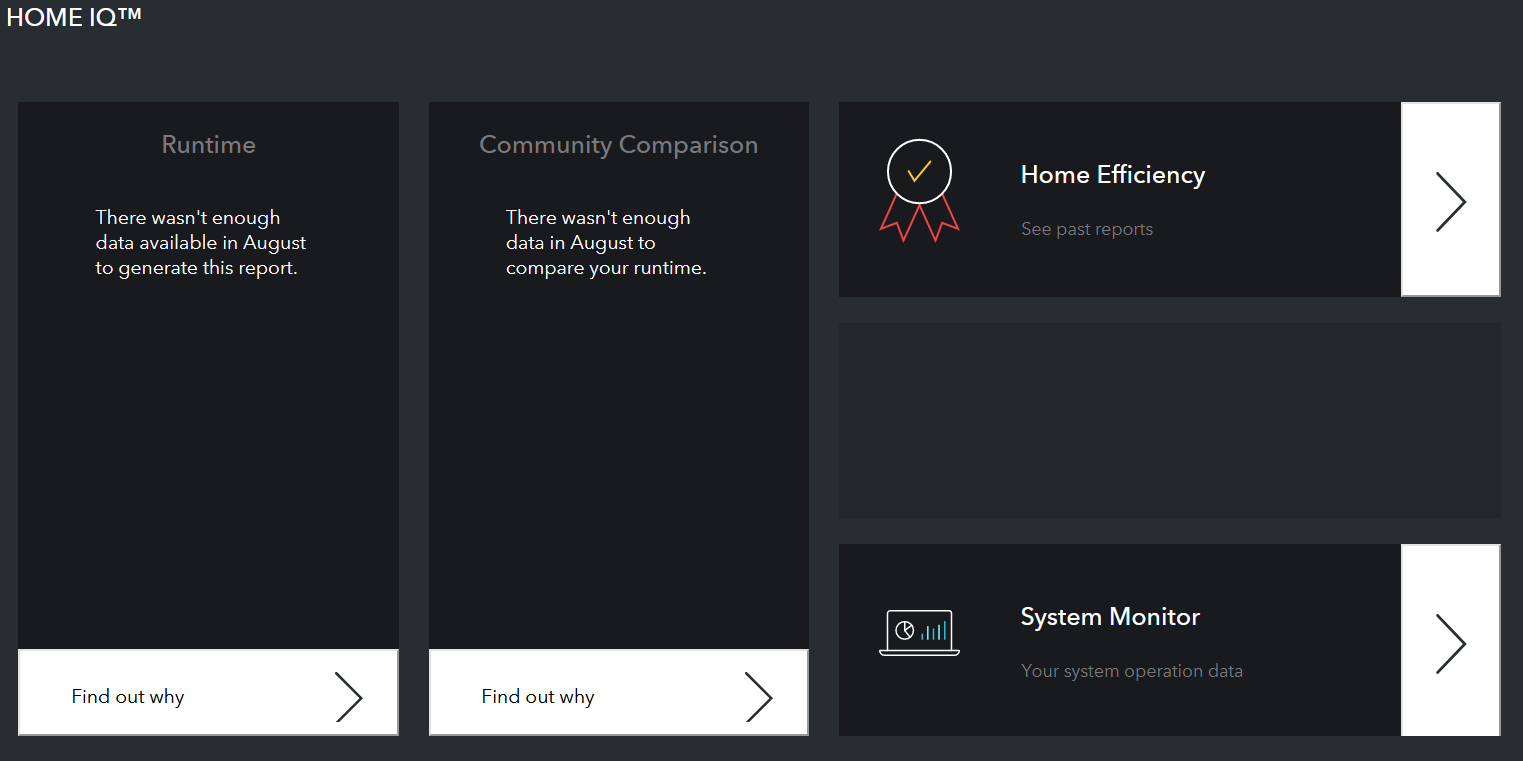
They seem to have some interesting data-sciency type features called HomeIQ. But you need to have at least a month worth of data before it starts providing any feedback. This fact makes it hard, at least on desktop, to see where you can do system monitoring online.
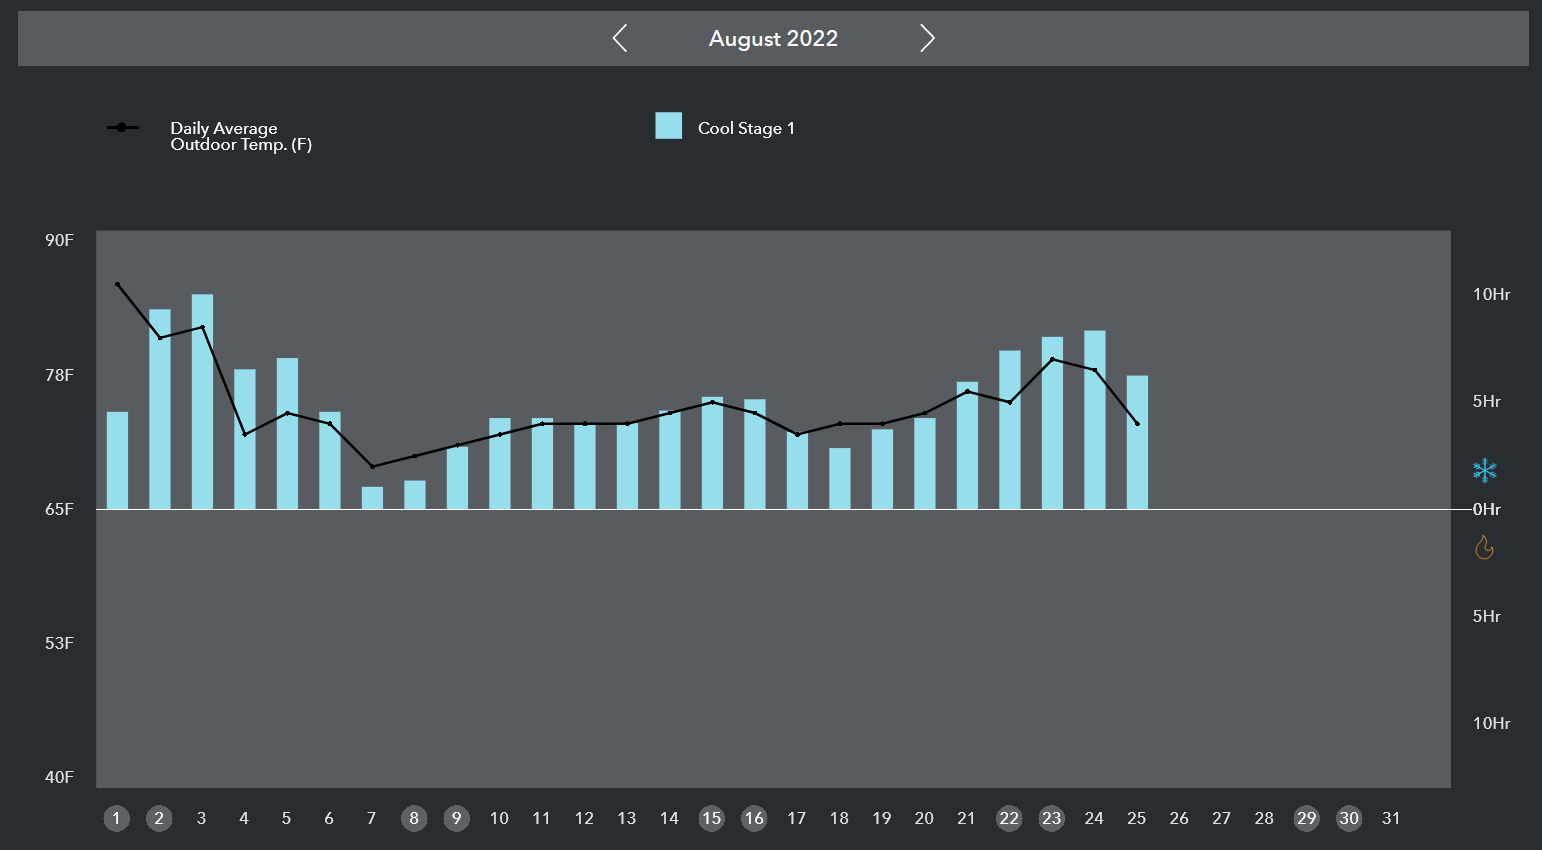
However if you scroll down past this information and look in the lower right corner you can find the link to system monitoring information.
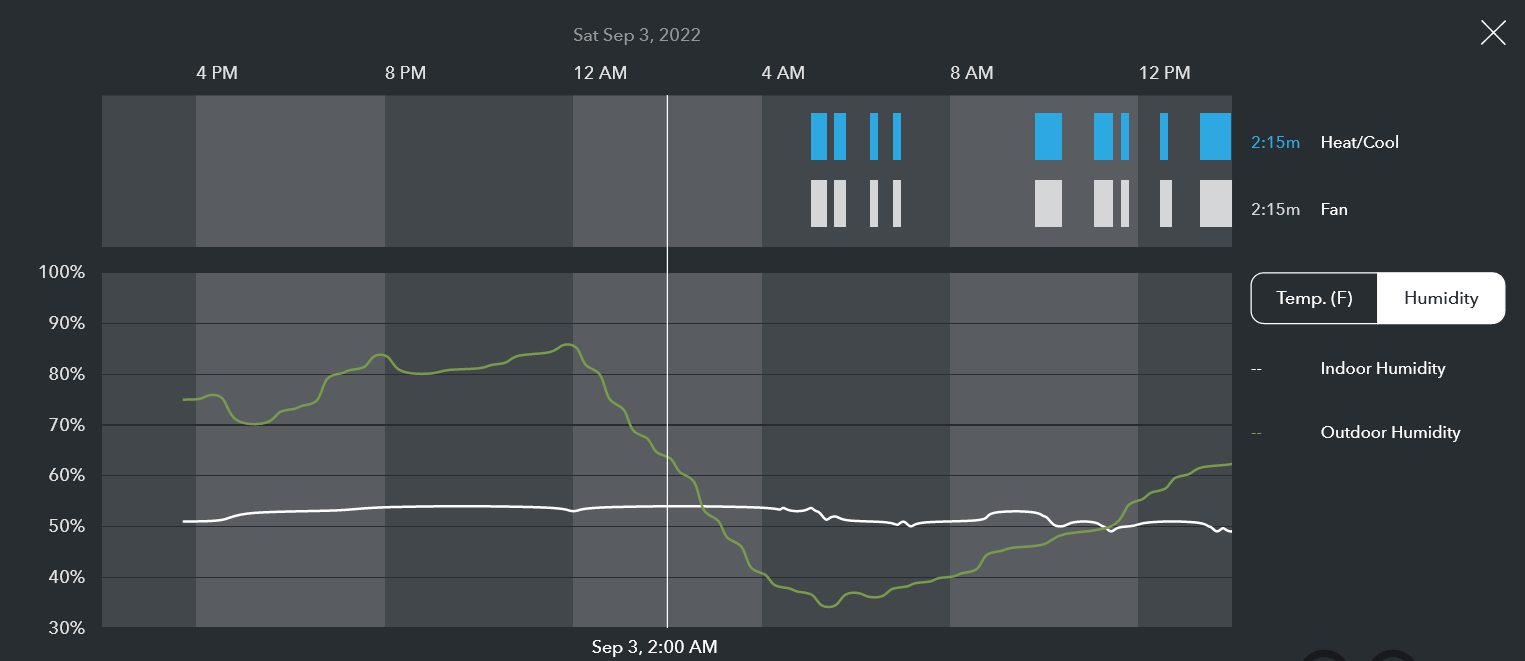
Here’s where you can see minute-by minute stats plotted against indoor and outdoor temperature
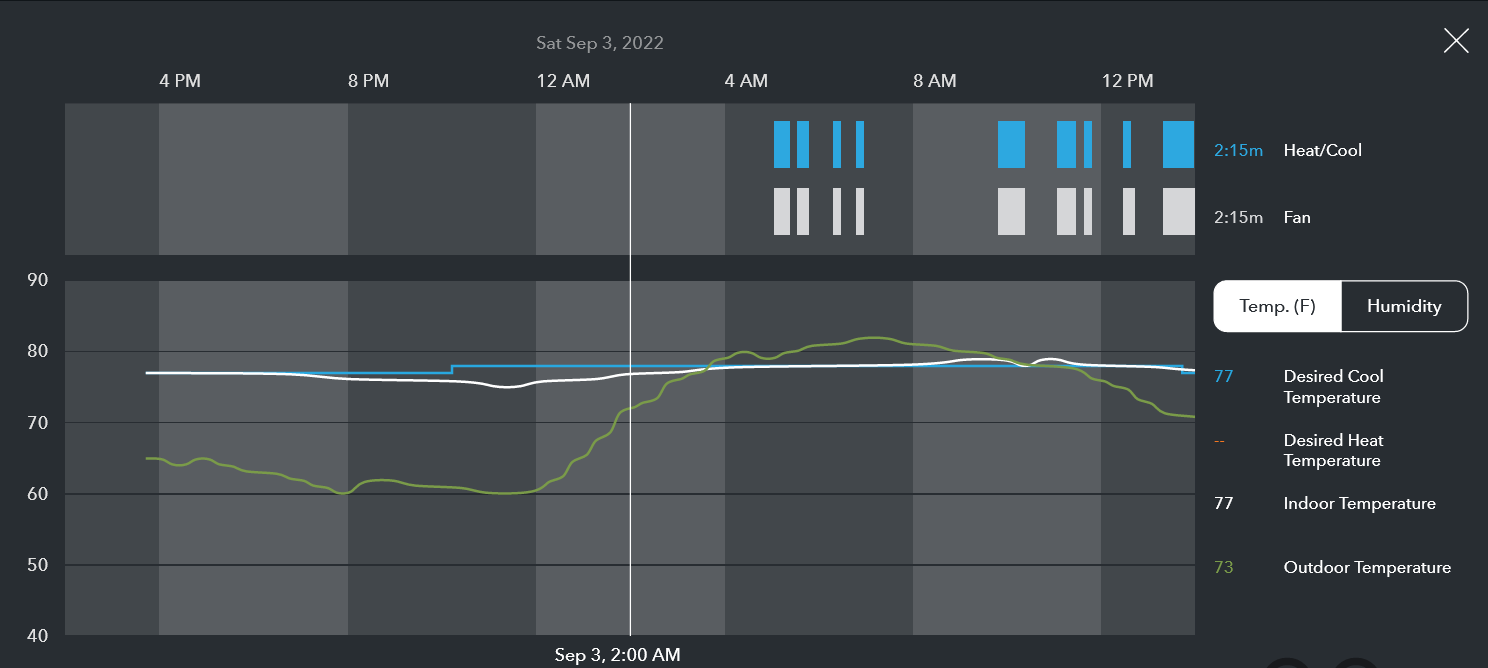
as well as humidity.
If you come back later (as I did for this blog post) you can see charts of data over wider time spans such as weekly and monthly. One interesting graph was titled “Weather Effect” and plotted average daily temperatures and total system run time.
The website also allows you to download data locally as CSV. Once Home Assistant is connected to the ecobee cloud it will periodically download and save this information as well, so in my use case there doesn’t seem to be much value in a manual download.
After exploring the web site I spent a little bit of time messing around with the app on my phone. It was amusing to wait for the furnace to shut off, then slide the temperature back down and hear it kick back on.
A new life for an old Pi
While it was nice to be able to adjust the thermostat from an app or web site, my true interest was in gathering sensor data. My hypothesis is that by tracking the indoor temperature and humidity against ambient temperature in humidity I would be able to establish some relationship between the outdoor environment and the house’s ability to regulate the indoor environment. However there are also a few potential automations that I have in mind, particularly related to managing our attic fan and triggering it to run based on temperature.
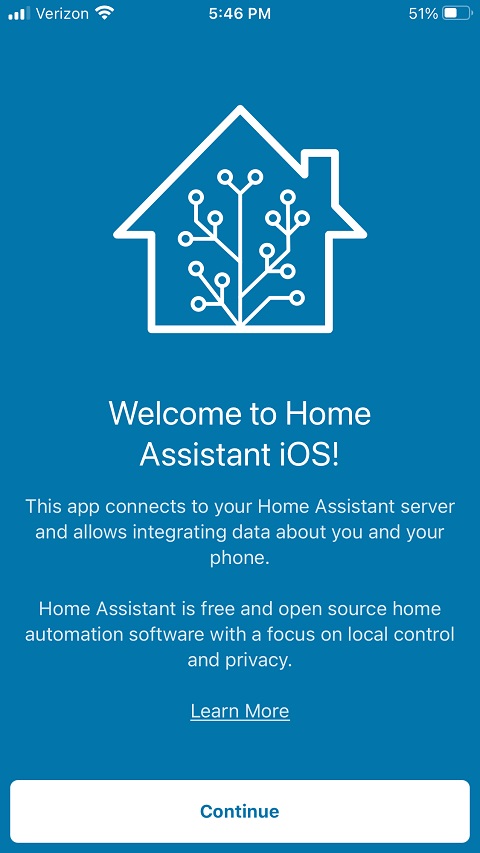
Based on a recommendation from a co-worker, I decided to standardize on Home Assistant. Not only is it open source, but it is also primarily written in python. Those characteristics made it hard to resist. The recommended installation method was via burning their OS image to an SD card for use with Raspberry Pi.
I have an RPi 3 that has been lying about for a number of years. I initially purchased it for use with Lego Mindstorms controllers, but it has mostly sat around unused. The installation went smoothly and I soon had the Pi up and running.
I ended up following the suggestions by both installing the iOS app and reading the founder’s vision for the platform. Before long, the installation had finished and it was time to dig in.
There were some initial steps required such as creating a username / password and setting a location for your home. The iOS app required Location Services to be enabled, which was a bit interesting. I initially tried to disable this but the app would not open unless location was enabled. So I begrudgingly set it up for only while using the app.
Not surprisingly, the first device to be configured was my phone. HomeAssistant recognized my phone right away and created a number of properties (I know that’s not the right terminology but I can remember the proper term) and started tracking things like battery state and whether or not the phone was charging. I could potentially see some value there but it also tracked things like local IP address and whether or not it was connected to Wifi. It didn’t take long before I had all of that functionality turned off.
Setting up the thermostat was pretty straightforward and the HomeAssistant documentation was clear. It required registering as a developer with ecobee, then using a PIN to authenticate the application.
Initial thoughts
Thus far I have to say I am a fan of HomeAssistant. The biggest reason is that HA strives to be a unifier of multiple products across multiple manufacturers. Also I appreciate that it is focused on local data storage as opposed to cloud-only. Currently all of the thermostat data is being pulled from cloud storage, but accordingly to some research it appears that I might be able to convert it to local-only via Homekit.
Lastly, it doesn’t hurt that HomeAssistant is primarily written in python - my programming language of choice.
Next Steps
So, that’s the story of our new smart thermostat and HomeAssistant as the overall smart hub for our house. Now that I’ve accomplish a basic setup as a starting point, next steps will include:
- configuring SSH to connect to the Pi from other hosts
- setting up an external hard drive for redundancy and data backups
- potentially moving to a different different SD card that is optimized for heavy I/O